
- Login to your Google Analytics account
- Click into the Admin section(bottom left)
- Click the +Create button(top left) and select Property
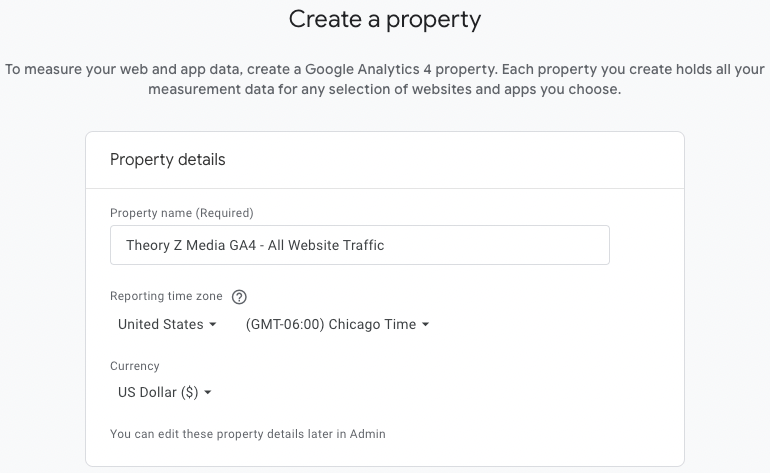
- Enter a name for your property e.g. “Theory Z Media GA4 - All Website Traffic”
- Select Reporting Time Zone that is relevant for your business
- Select Currency
- Click Next
- Select Industry & Business Size options that are relevant for your business(new requirements)
- Click Next
- Choose Business Objectives (for personalized reports)
- Click Next
- Choose a platform (Web or App) *Chose Web for this guide*
Blog
Natalie Siebenaler • November 10, 2023
GA4 Basics Blog Series: How to Setup Google Analytics 4
Change is hard. Our brains simply do not like change. But change can be good and that is the optimism we need when becoming proficient in Google Analytics 4(GA4). Yes, GA4 brings many changes compared to Universal Analytics(GA3), however, let’s look at it as an opportunity to learn and grow, rather than focus on the negatives. So with an open and optimistic mindset, let’s walk through how to set up your GA4 account properly!
How to Create a GA4 Property:
How to Create a GA4 Data Stream:
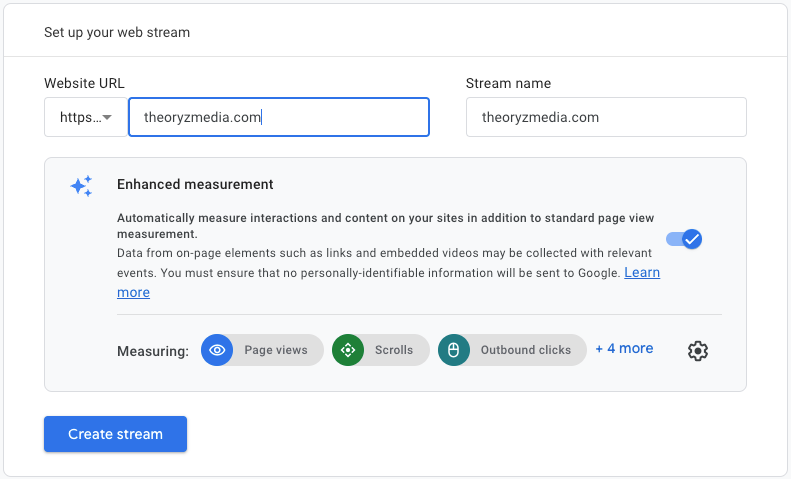
- Setup Data Stream (what it’s called when collecting data from the site).
- Enter Website URL for the site you want to track e.g. theoryzmedia.com. Make sure to include https and www (or not).
- Enter Stream Name e.g. theoryzmedia.com (try to be consistent with all naming conventions in your account).
- Click Gear⚙️ Icon to Configure Enhanced Measurement
- Here you should choose which events are important to measure. We recommend selecting all options except Form Interactions. Consider not auto-tracking form interactions as this can track form submissions every time your Facebook Pixel tag fires.
- Click Create Stream
How to Install GA4:
A pop-up window appears after you clicked “Create Stream” with two options for Installation Instructions which include “Install with a Website Builder or CMS” or “Install Manually”. Look at both options and determine which is easiest for you or your development team. Keep in mind that you can choose a different plugin (Site Kit, SquareSpace, etc) other than the option automatically provided for “Install with a CMS”. We prefer to install the code via our Google Tag Manager account so below is a walk through of how to do this.
How to Install GA4 with Google Tag Manager:
Google Analytics 4:
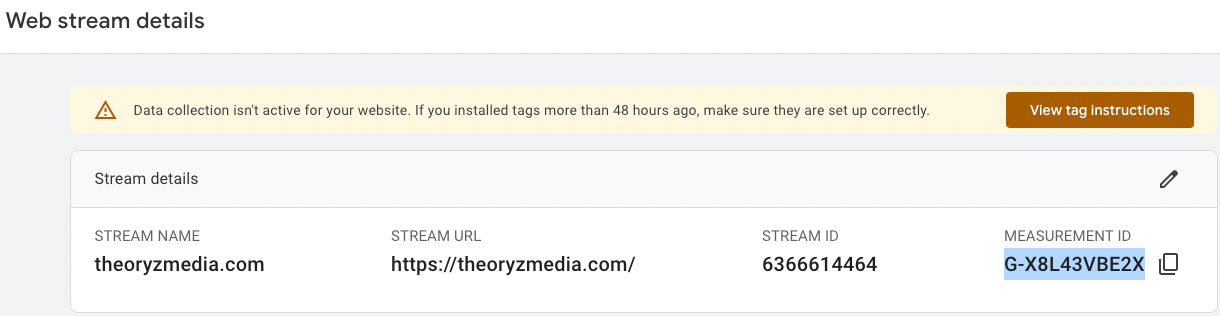
- Click Into Admin section
- Click Data Streams (under Data Collection and Modification)
- Click into the stream you want installed
- Copy the Measurement ID (highlighted below) **Make sure you’re using Measurement ID, not Stream ID: 10-digit, alphanumeric, starts with G-
Google Tag Manager:
- Click into Tags section
- Select “New” button
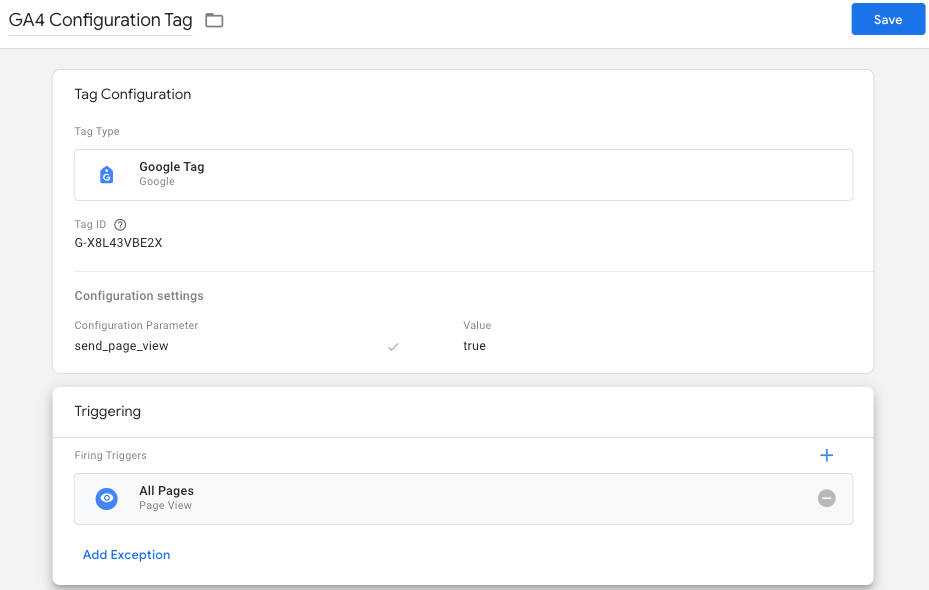
- Label Tag Example “GA4 Configuration Tag”
- Click into Tag Configuration
- Click Google Analytics, then click “Google Tag”
- Under Tag ID paste your GA4 Measurement ID e.g. G-X8L43VBE2X
- Click Configuration Settings, then click Add Parameter
- Enter the following: Configuration Parameter: send_page_view | Value: true
- Click into Triggering, Add “All Pages” trigger
- Save & Publish! Should look like this:
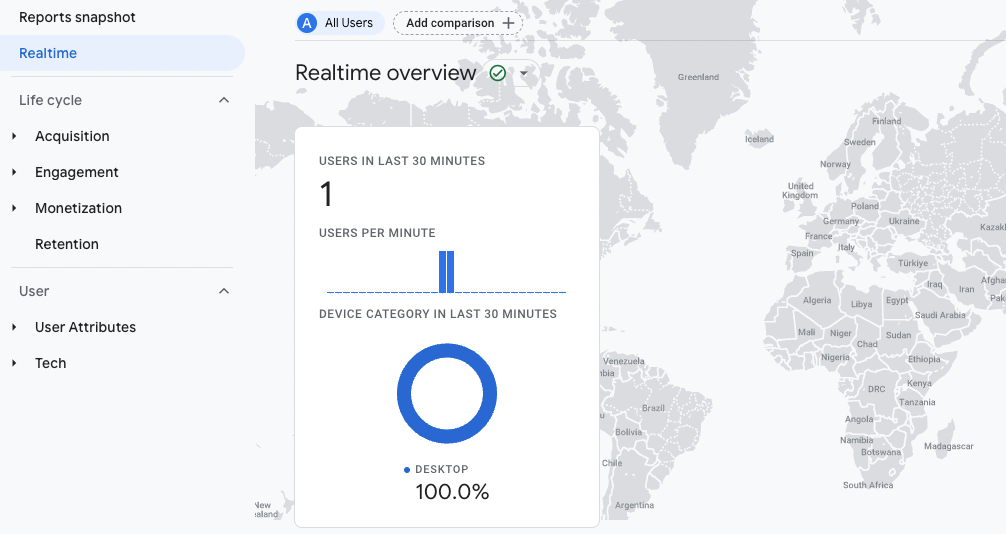
Check that your GA4 code is working in the GA4 Realtime Report
- Close out of Web Stream Details section
- Click into Reports in the left navigation menu
- Click report titled Realtime
- If the code is active and firing successfully via GTM, you should see data populating here such as Users in the Last 30 Minutes should have at least 1.
- Keep in mind that you need to wait at least 24-48 hours for the other reports in GA4 to start populating data.
Congratulations! You have now created a GA4 Property!
How to Optimize GA4 Data Settings
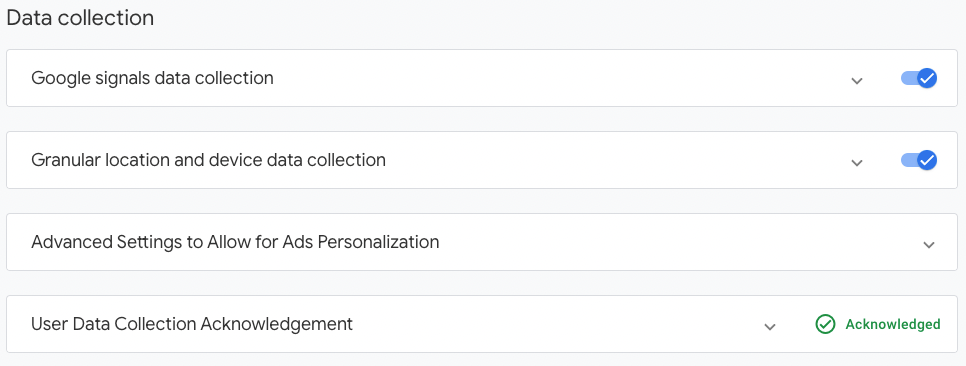
Data Collection:
- Google Signals: Turn on for ad personalization, turn off for less sampling/thresholding
- *If turned on, a Privacy Policy page must be live on the website and include these requirements in order to follow Google Policy.
- Instructions:
- Click into Admin section(bottom left corner)
- Click Data Collection (under Data Collection and Modification Section)
- Turn each section on or leave off, choose to acknowledge the User Data Collection Acknowledgement
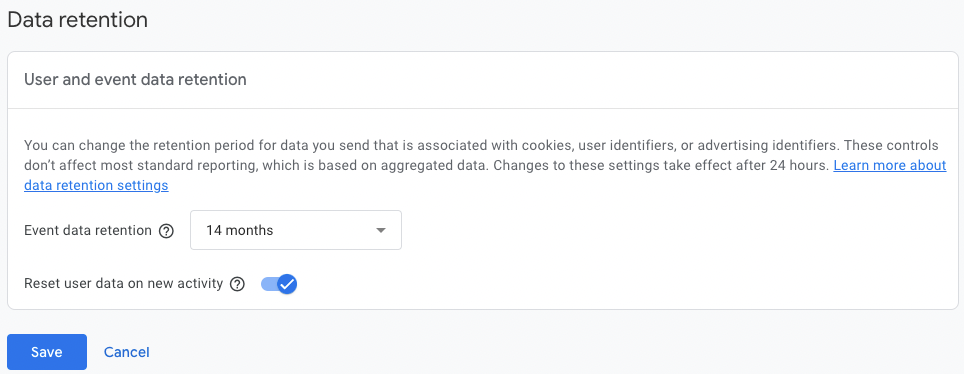
Data Retention:
- Customize the event data retention period here, meaning when GA4 can remove extra details on your events (called event parameters) that are saved with events. We recommend changing this to 14 months.
- Instructions:
- Click into Admin section(bottom left corner)
- Click Data Retention (under Data Collection and Modification Section)
- Select 14 Months option
- Save
Data Filters
- Create internal traffic filters to exclude website traffic from employees, vendors and more.
- Instructions:
- Step 1 Data Streams Section:
- Click Data Streams (under Data Collection and Modification Section)
- Click into the Data Stream you want modified
- Select Configure Tag Settings
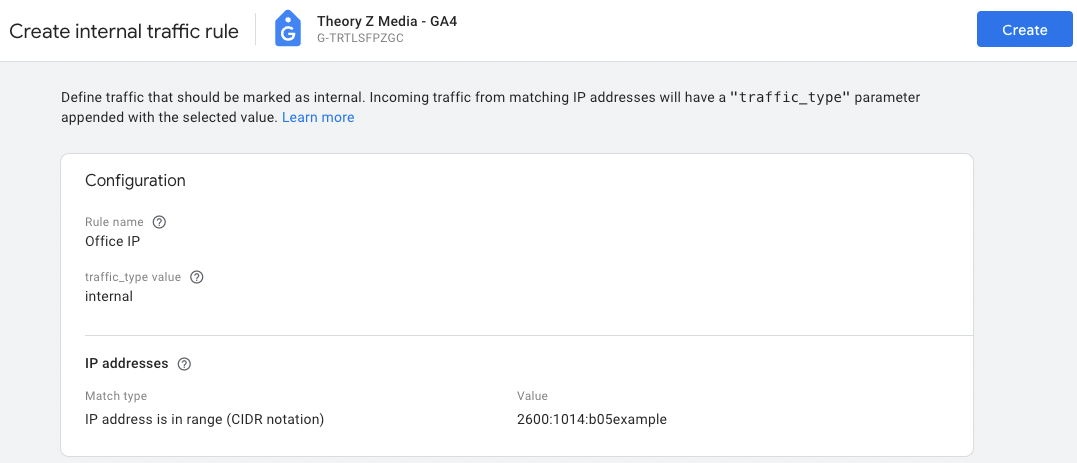
- Select Define Internal Traffic
- Click Create Button
- Add a filter name such as Minnesota Office IP
- In the Value section, paste your IP address (If you don’t know your IP you can Google in a separate window “What is my IP” and get this here)
- Click Create
- Step 2 Data Filters Section:
- Go back to main Admin section
- Click Data Filters (under Data Collection and Modification Section)
- Click into the filter created by default here titled “Internal Traffic”
- Note: This is setup to exclude anything with a traffic type parameter that is internal which is why step 1 was needed.
- Keep traffic_type parameter as internal
- Recommend Filter state to stay at Testing until you’re sure you’re capturing traffic correctly. Once this is set to Active that data is gone and you cannot get it back.
- Save
Configure Your Domains
- If you’re using this GA4 property in more than one domain you will need to configure the Cross Domain Settings. With this setting we are basically telling GA4 that it’s okay to collect data from two or more separate domains.
- Instructions:
- Click Data Streams (under Data Collection and Modification Section)
- Click into the Data Stream you want modified
- Select “Configure Tag Settings”
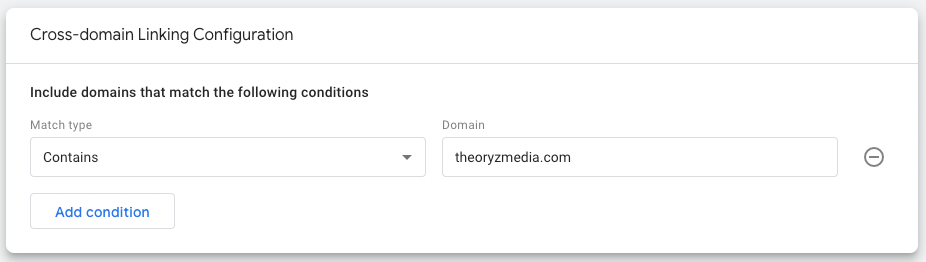
- Select “Configure Your Domains”
- Keep Match type at “Contains”
- Domain section - type in any domain that is okay for cross-domain measurement
- Save
List Unwanted Referrals
- Identify any third party sites you may have that you do not want listed as referral traffic such as payment gateways, appointment sites, etc.
- Instructions:
- Click Data Streams (under Data Collection and Modification Section)
- Click into the Data Stream you want modified
- Select “Configure Tag Settings”
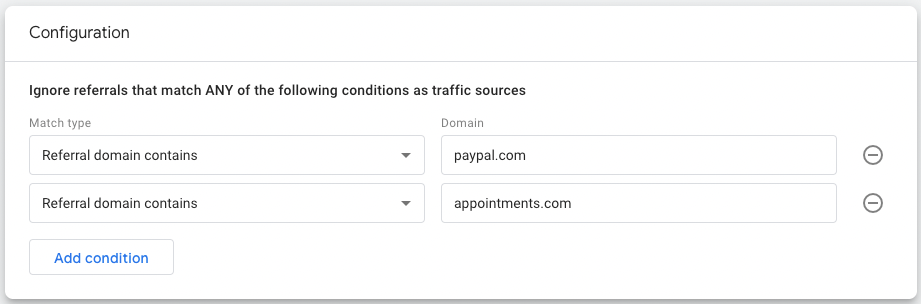
- Select “List Unwanted Referrals”
- Keep Match type at “Referral domain contains”
- Enter website in Domain section e.g. paypal.com
- Select Add Condition to add more websites
- Save
Adjust Session Timeout
- Adjust how long it takes before sessions expire due to inactivity or become engaged sessions. Default is set to 30 minutes though you can go up to 7 hours and 55 minutes. This is optional and completely up to what makes sense for your business.
- Instructions:
- Click Data Streams (under Data Collection and Modification Section)
- Click into the Data Stream you want modified
- Select “Configure Tag Settings”
- Select “Adjust Session Timeout”
- Change time or leave as is
- Save

How to Define Audiences in GA4
Audiences let you segment your users in the ways that are important to your business. You can segment by dimensions, metrics, and events to include practically any subset of users. These can then be exported for use in remarketing lists. Let’s walk through one example:
- Click into Admin section
- Click Data Display
- Select Audiences
- Select New Audience Button
- Choose “Create a custom audience”
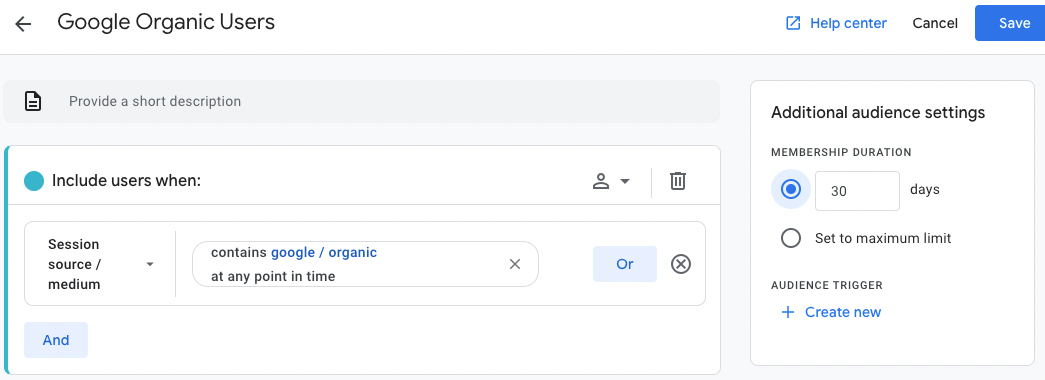
- Label Audience “Google Organic”
- Click into “Add New Condition”
- Select Traffic Source, Session Source/Medium
- Add filter Contains = google / organic, Select Apply
- Adjust Membership Duration as needed such as 30 days
- Save
GA4 Integrations & Product Links
There are many Product Link options to connect to your GA4 including Google Ads, BigQuery, Merchant Center, Google Play, Search Console and more. We strongly recommend that you link all available products to the account as this will give you more insight and reporting for your overall business. Connecting the accounts is done under Admin>Property Settings>Product Links.
One big piece missing from this guide is how to set up events and conversions. GA4 is all about events and getting them right is important. That is why we plan to dedicate a separate article covering this in full detail which will launch next week. Stay tuned!
You now have the basics down for setting up your GA4 property properly and I hope you stayed optimistic throughout the process. Remember that change can be a good thing! If you have any questions please don’t hesitate to reach out to us. Email us at info@theoryzmedia.com, call us at 651-335-7093 or fill out our website contact form.